TIME-SERT® FORD TRITON SPECIAL M16x1.5
SPARK PLUG REPAIR 3 VALVE HEADS
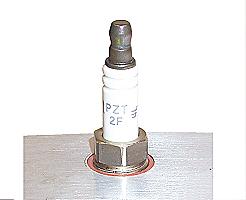
Kit will repair Ford 3 Valve spark plugs Special M16x1.5
Autolite HT plugs or MOTORCRAFT PLATINUM PZT
[click here]
note:
spark plug hex uses 9/16 socket.
CUTTING FLUID
A Cutting Fluid is necessary for reaming and tapping. (WD40)
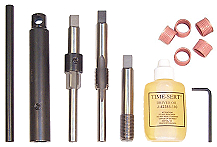
SPARK PLUG REPAIR KIT 6603221
|
|
|
|
1 |
66244190 |
Handle |
|
|
1 |
66232210 |
Wrench |
|
|
1 |
66232211 |
Reamer |
|
|
1 |
66232212 |
Tap |
|
|
1 |
66232213 |
Driver |
|
|
1 |
66255516 |
hex key 1/8 |
|
|
1 |
6626010 |
Oil |
|
|
5 |
66132214 |
M16x1.5x12.7mm
|
|
INSTRUCTIONS
USE CAUTION WHEN DOING �Over the fender repairs� If you would like
to repair without
removing the head make sure the valves are Closed and the piston
is all the way down.
Working with head off
vehicle Before you proceed : Make sure that the head is raised above
the working surface at least an inch or 25mm so that the pilots on the tap and
reamer tools
have clearance as to not hit the surface below. If repairing on a workbench
this can be
accomplished by using 2 short pieces of 2�x 4�wood to raise the head from the
surface then
secure head in place. The valves must be closed when repairing.
Instructions
are using a block of aluminum for better viewing.
|
PAGE 1 |
|
A:
|
B:
|
-
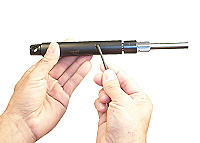
Using the wrench provided, place the reamer into the square of the wrench and tighten the set screw to secure the reamer in place.
The pilot on the reamer will keep the newly reamed hole square to the original threads
Picture A.
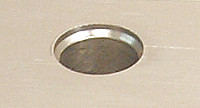
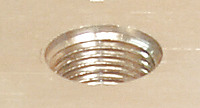
Ream the hole until the black stop collar bottoms out on the hole and spins freely.
This will create a countersink for the flange of the insert.
Picture B .
|
C:
|
D:
|
|
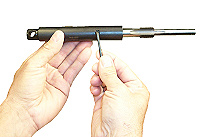
2. Using the wrench provided, place the tap into the square of the wrench and tighten the set screw to secure the tap in place.
Picture C.
Tap the hole to the full depth permitted by the tool. The tap should "stop" or bottom out as it comes in contact with the bottom of the
newly reamed hole. Picture D.
|

E:
|
F:
|
|
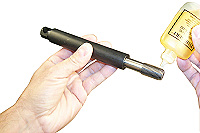
3. Using the wrench provided, place the Driver into the square
of the wrench and tighten the set screw to secure the driver in place.
Picture E.
Oil the bottom threads of the Driver tool with a few drops of driver oil.
Picture F.
|
G:
|
H:
|
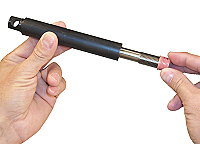
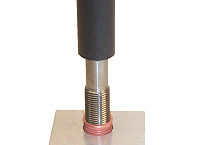
4. Screw an insert onto the driver and into the newly prepared hole.
Picture G.
While screwing the driver into the insert you well feel the driver start to tighten up, with a little more
power continue through the insert until it loosens up. The driver will cold form the last few threads of the insert locking it in place.
Picture H.
Remove driver, repair is complete.
The new steel threads are now square to the original spark plug hole.
Note:
Technically the spark plug size on the
3 valve head is a M15.5x1.5 which we consider a special M16x1.5.
|
|
|
|
 |
|
![[click here]](http://www.dssales.net/html/sparkplug/3valve/Plug-sm.jpg)